Last Updated: November 9, 2026
Quick Summary
The best pour-over ratio sits between 1:15 and 1:17, and 1:15 is where most people should start. That means 20g of ground coffee to 300g of water, weighed in grams. From there you adjust one variable at a time, starting with grind before changing the ratio.
- A 1:16 ratio uses 20g of coffee to 320g of water for a lighter, more tea-like cup.
- For 250 ml of water at 1:15, use about 17g of coffee.
- Bloom with 40g of water for 30 seconds before pouring the rest in slow circles.
- If the cup tastes sharp or sour, the grind is too coarse rather than the ratio being wrong.
- The repeatable V60 recipe at 1:16 finishes brewing between 2:30 and 3:00.
Table of Contents
- Why the Pour-Over Ratio Decides Your Cup
- What a 1:15 or 1:16 Ratio Actually Means
- The Recommended Starting Point: A Pour-Over Coffee Ratio of 1:15
- How Many Grams of Coffee for 250 ml of Water
- Using a Pour-Over Coffee Ratio Calculator and the Metric Chart
- How to Fix Weak Pour-Over Coffee Without Guessing
- Matching the Ratio to Your Dripper, Filter and Beans
- Choosing Beans and Grind for Your Pour-Over Ratio
- Frequently Asked Questions
Why the Pour-Over Ratio Decides Your Cup
The best coffee to water ratio for pour-over sits between 1:15 and 1:17, and 1:15 is where most people should start. That single number decides whether your cup tastes thin or rich, sour or sweet. Get it right and everything else, grind, water, pour, becomes fine-tuning rather than guesswork.
At Kiboko Coffee Co, we roast for people who want a repeatable cup, not a lucky one. The ratio is the foundation of that.
Here is the part most guides skip: ratio is not the same as strength. A 1:15 brew can still taste weak if your grind is too coarse. We will show you how to tell those problems apart.
What a 1:15 or 1:16 Ratio Actually Means
A pour-over ratio of 1:15 means one part coffee to fifteen parts water by weight. So 20g of ground coffee gets 300g of water. The 1:16 version uses 20g to 320g, giving a slightly lighter, more tea-like cup.
Weigh everything in grams. Water weighs 1g per millilitre, so 300ml of water is 300g. That makes the maths simple.
- 1:14 to 1:15: richer, heavier, more body
- 1:16 to 1:17: brighter, cleaner, more clarity
- 1:13 or lower: concentrated, easy to over-extract
The Specialty Coffee Association's brewing standards treat ratio as a core control, alongside grind and water temperature. It is not a detail.
The Recommended Starting Point: A Pour-Over Coffee Ratio of 1:15
Start at a pour-over coffee ratio of 1:15. It suits most medium roasts, most drippers and most palates. From there you adjust one variable at a time.
Here is a simple method to try:
- Weigh 20g of coffee and 300g of water.
- Set your grinder to medium, like coarse sand.
- Heat water to around 93°C.
- Bloom with 40g of water for 30 seconds.
- Pour the rest in slow circles, finishing by 2:30 to 3:00.
If the cup tastes sharp or sour, the ratio is not your problem, the grind is too coarse. If it tastes bitter and drying, grind finer or shorten the brew.
How Many Grams of Coffee for 250 ml of Water
For 250 ml of water at 1:15, use about 17g of coffee. At 1:16, use roughly 16g. Round to the nearest gram your scale handles.
That is the question people ask most, and the answer is a straight division: water in millilitres divided by your ratio.
- 250 ml at 1:15 = 16.7g, round to 17g
- 250 ml at 1:16 = 15.6g, round to 16g
- 300 ml at 1:15 = 20g
- 500 ml at 1:15 = 33g
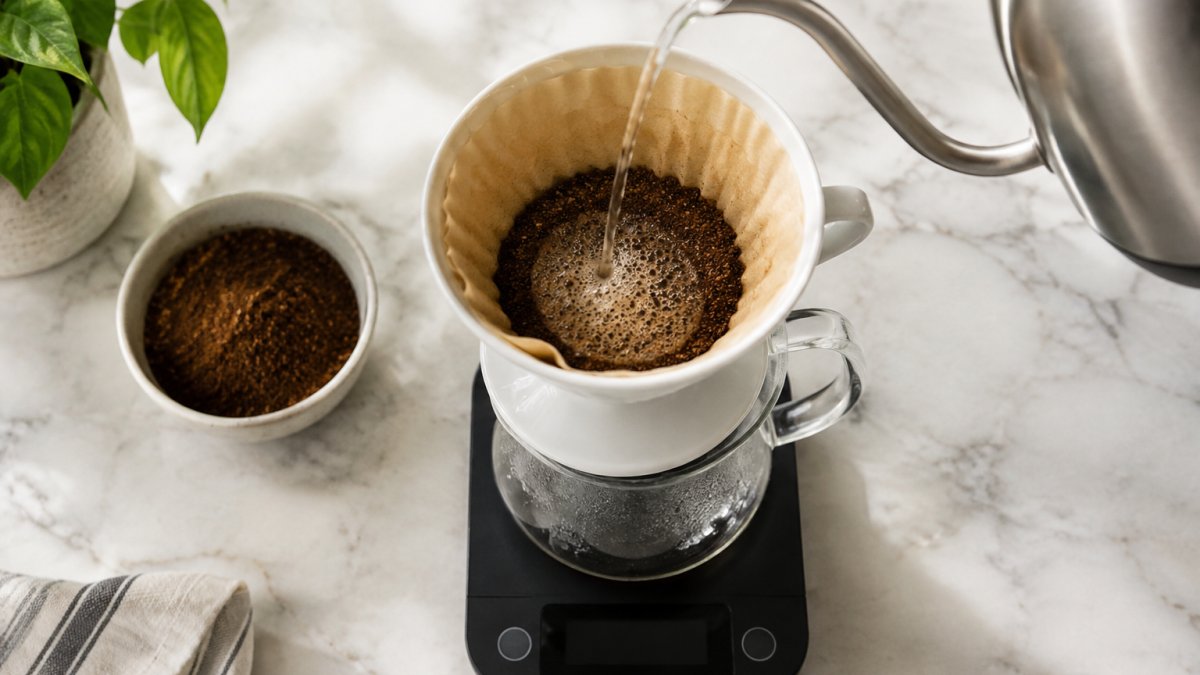
A common mistake is scooping instead of weighing. A tablespoon of coffee varies wildly with grind and bean density. A digital scale makes it much easier to brew consistently.
Using a Pour-Over Coffee Ratio Calculator and the Metric Chart
A pour-over coffee ratio calculator just divides your water weight by your ratio. You do not need an app, though several exist. The chart below does the same job faster.
| Coffee dose | Water at 1:15 | Water at 1:16 | Typical brew |
|---|---|---|---|
| 12g | 180 ml | 192 ml | Small single cup |
| 15g | 225 ml | 240 ml | Standard mug |
| 17g | 255 ml | 272 ml | 250 ml serving |
| 20g | 300 ml | 320 ml | Large cup |
| 30g | 450 ml | 480 ml | Two cups |
Keep this table on your phone. Weigh the dose first, then pour to the matching water figure. That is the whole calculator.
How to Fix Weak Pour-Over Coffee Without Guessing
Weak pour-over coffee is not one problem, it is at least three. Before you change anything, work out which one you have. The fix for a dilute brew is different from the fix for an under-extracted one, and treating them the same is how people end up with bitter, hollow cups.
Start by separating strength from extraction. Strength is how much dissolved coffee is in the cup, and it is set mainly by the ratio. Extraction is how much of the coffee's soluble material you have pulled out of the grounds, and it is set mainly by grind, water temperature, agitation and contact time. A 1:15 brew can taste weak if the grind is too coarse, because you have used enough coffee but left too much flavour in the grounds. A 1:15 brew can also taste weak if you have used too little coffee for the water. Those are different faults.
Use this controlled method, changing only one variable per brew:
- Taste for sourness or bitterness first. Sour, sharp, thin-tasting coffee usually points to under-extraction. Bitter, drying, ashy coffee points to over-extraction. If the cup is simply watery but not sour or bitter, the ratio is the likely culprit.
- Check the ratio before anything else. If you used 20g of coffee to 400ml of water, that is 1:20, which is dilute. Tighten to 1:15 (20g to 300ml) and taste again. Do not change grind and ratio in the same brew.
- If the cup is sour, grind finer. Move one setting at a time on your grinder. A finer grind slows the flow and increases contact time, which pulls more flavour. Taste after each change.
- If the cup is bitter, grind coarser or shorten the brew. Coarsening the grind speeds the flow and reduces contact time. Alternatively, stop the pour earlier, but only if you are weighing your water.
- Adjust water temperature last. For lighter roasts, 94°C to 96°C can help draw out more flavour. For darker roasts, 90°C to 93°C reduces the risk of bitterness. Change temperature only after you have settled the grind.
- Stir the bloom gently. A gentle stir during the 30-second bloom helps saturate the grounds evenly, which improves extraction consistency. Do not stir vigorously, as this can clog the filter and slow the drawdown.
Watch out: fixing a weak cup by adding more coffee without checking grind often makes it bitter instead, because you increase the dose while the extraction is still uneven. Fix extraction before you fix dose.
A common pattern is to blame the ratio for every fault. In practice, most weak cups at a 1:15 ratio come from a grind that is too coarse or water that is not hot enough. If you have tightened the ratio to 1:15 and the cup is still thin, stop changing the ratio and look at grind and temperature. For broader brewing guidance, see how to brew speciality coffee at home.
Matching the Ratio to Your Dripper, Filter and Beans
Different drippers change flow, so the ratio shifts with them. Different drippers change flow, so the ratio can shift with them. Treat the figures below as starting points, not rules. These are starting points, not rules. The repeatable recipe below shows how to pair the ratio with dose, grind, bloom, pour schedule and total brew time so you can reproduce results.
A repeatable V60 recipe at 1:16
- Dose: 20g of coffee
- Water: 320g (320ml)
- Grind: medium-fine, like table salt
- Water temperature: 93°C
- Bloom: 40g of water, 30 seconds
- Pour schedule: pour to 120g by 0:45, to 220g by 1:15, to 320g by 1:45
- Total brew time: 2:30 to 3:00
A repeatable flat-bed recipe at 1:15
- Dose: 20g of coffee
- Water: 300g (300ml)
- Grind: medium, like coarse sand
- Water temperature: 93°C
- Bloom: 40g of water, 30 seconds
- Pour schedule: pour to 150g by 0:45, to 300g by 1:30
- Total brew time: 2:15 to 2:45
A repeatable Chemex recipe at 1:16
- Dose: 30g of coffee
- Water: 480g (480ml)
- Grind: medium-coarse, like sea salt
- Water temperature: 94°C
- Bloom: 60g of water, 45 seconds
- Pour schedule: pour to 200g by 1:00, to 350g by 1:45, to 480g by 2:30
- Total brew time: 3:30 to 4:00
Filter choice matters too. If you change filter type, expect the drawdown time to change, and adjust grind before you adjust ratio.
Beans change the target as well. If you are deciding between bean styles, our guide on single origin coffee vs coffee blends explains the trade-offs, and our notes on which filter coffee beans are best for morning brewing help you pick.
Watch out: if you change dripper and keep the same grind and ratio, the brew time will shift and the cup will taste different. Change one thing at a time: first the recipe, then the grind, then the ratio.
Choosing Beans and Grind for Your Pour-Over Ratio
The ratio only works if the grind matches it. A medium grind is a common starting point for pour-over, roughly the texture of coarse sand.
Freshness counts. At Kiboko Coffee Co, every order is roasted to demand and rested before packing, and we offer four grind sizes plus whole bean.
For pour-over, our Kenya Nyeri AA brings blackcurrant and cocoa notes. Prefer to dial in your grind first? Read our guide on how to choose coffee grind size.

The ratio is the one variable you can control every single brew. Get the dose and water weight right, then adjust grind and temperature with confidence.
Kiboko Coffee Co makes that easier with freshly roasted specialty beans, four grind sizes to match your dripper, and £1 from every kilo going to Farm Africa. Most orders arrive next working day.
Get started with Kiboko Coffee Co and brew a cup you can repeat tomorrow morning.
Frequently Asked Questions
What is the best coffee-to-water ratio for pour-over coffee?
Start at 1:15, meaning one gram of ground coffee for every 15 grams (roughly millilitres) of water. That gives a balanced cup for most medium roasts. If you prefer a lighter, tea-like body, move to 1:16; if you want more intensity, try 1:14. Weigh both coffee and water rather than using scoops, because a level tablespoon of coffee can vary by several grams depending on grind and bean density.
How many grams of coffee do I need for 250 ml of water?
At a 1:15 pour-over ratio, 250 ml of water needs about 17 g of coffee. For a 1:16 ratio use roughly 16 g, and for a stronger 1:14 ratio use about 18 g. Remember that some water stays trapped in the coffee bed and filter, so a 250 ml brew yields closer to 210-220 ml in the cup. Scale the same maths for larger brews: 500 ml at 1:15 needs around 33 g.
Is a 1:15 or 1:16 ratio better for pour-over?
Neither is objectively better; they suit different tastes and beans. A pour-over coffee ratio of 1:15 extracts slightly more from the grounds and gives a fuller, sweeter cup, which works well with chocolatey medium roasts. A 1:16 ratio produces a lighter, clearer brew that lets bright, fruity single origins show their acidity. Try both with the same bean and grind, changing only the water weight, then keep the one you prefer.
How do I fix weak pour-over coffee?
First check your ratio: if you are brewing at 1:16 or wider, tighten it to 1:15 or 1:14 before changing anything else. Next, grind finer in small steps, since an under-extracted brew tastes thin and sour as well as weak. Keep water just off the boil, around 92-96°C, and make sure your bloom gets 30-45 seconds with roughly twice the coffee's weight in water. Change one variable at a time so you know what fixed it.