Last Updated: November 19, 2026
Quick Summary
To make espresso at home for beginners, preheat your machine for at least 15 minutes, dose 18g of ground coffee into the basket, level and tamp flat, then pull a shot aiming for 25-30 seconds. Keep the dose locked at 18g in and 36g out, and change only the grind, one notch at a time, until the shot tastes balanced.
- Start with four essentials: an espresso machine, a burr grinder, a digital scale accurate to 0.1g and a matching tamper.
- A blade grinder chops unevenly, so buy a burr grinder and spend on it before upgrading your machine.
- Espresso grind should feel like fine sand that clumps slightly when pinched, not powdery or gritty.
- Sour shots mean under-extraction, so grind finer; bitter shots mean over-extraction, so grind coarser.
- Our Nyumba Blend at £10.99 is a medium roast we point most beginners to, and every kilo sold sends £1 to Farm Africa.
Table of Contents
- Essential Equipment for Beginners
- How to Use an Espresso Machine: Your First Shot
- Espresso Grind Size: Getting It Right
- How Long to Pull an Espresso Shot
- Dialling In: A Repeatable Workflow
- Making Espresso Without a Machine
- Troubleshooting: Why Your Espresso Tastes Sour or Bitter
- Choosing Beans and Ordering Your First Bag
- Frequently Asked Questions
Essential Equipment for Beginners
Learning how to make espresso at home for beginners starts with four items: a machine, a burr grinder, a digital scale and a tamper. Skip the extras until these four feel natural.
Here is the short list that actually matters:
- Espresso machine with a 58mm or 54mm portafilter
- Burr grinder (flat or conical), not a blade grinder
- Digital scale accurate to 0.1g
- Tamper that matches your basket size
- Freshly roasted coffee beans, rested and ready
A blade grinder is the one purchase we would talk you out of. It chops rather than grinds, so the particles land all over the place and your shot pulls unevenly.
What Is Essential Versus Optional
Most beginners overspend on the machine and underspend on the grinder. The grinder matters more for shot quality than the machine does, because it controls the particle size distribution that extraction depends on. A common pattern is to buy a £500 machine and a £30 blade grinder, then wonder why the shots taste muddy. Spend on the grinder first.
Essential from day one:
- Espresso machine with a pressurised or non-pressurised basket (see below)
- Burr grinder with stepless or fine-step adjustment
- Digital scale accurate to 0.1g
- Tamper that fits your basket snugly
- Fresh beans with a roast date
Optional until you have the basics working:
- Distribution tool (WDT needle tool or levelling tool)
- Bottomless portafilter (useful for diagnosing channelling, not essential)
- Knock box (a sturdy bowl works)
- Milk jug if you drink milk drinks
- Descaling solution and cleaning tablets
Realistic UK Price Tiers
Prices vary by retailer and season, but these ranges reflect what beginners typically pay in the UK. Treat them as guidance, not gospel.
| Tier | Machine | Grinder | What you get |
|---|---|---|---|
| Entry | £150-£300 | £100-£200 | Pressurised basket machines and entry burr grinders; forgiving but limited |
| Mid | £300-£600 | £200-£350 | Non-pressurised baskets, better temperature stability, stepless grinders |
| Upper | £600-£1,000+ | £350-£500+ | Dual boilers or heat exchangers, PID control, commercial-style burrs |
A pressurised basket uses a valve to create back-pressure, so it works with pre-ground coffee and a cheaper grinder. A non-pressurised basket relies on the coffee itself to create resistance, which demands a good grinder and fresh beans but gives you more control and better flavour.
Watch out: a machine advertised as "15 bar" is not better than a 9 bar machine. Espresso brews at around 9 bar; higher pump ratings are marketing, not quality.
Upgrade Priorities
If you are building up over time, upgrade in this order:
- Beans and grinder, the biggest gain per pound spent.
- Basket and tamper, a precision basket and well-fitting tamper improve consistency cheaply.
- Machine, only once your grinder and technique are solid.
- Accessories, distribution tools, bottomless portafilter, knock box.
For a deeper walkthrough of machine types, see our guide on how to choose coffee grind size for the grinder side, and our piece on the best coffee beans for home espresso for the bean side.
How to Use an Espresso Machine: Your First Shot
To use an espresso machine, preheat it for at least 15 minutes, dose 18g of ground coffee into the basket, level and tamp, then pull a shot aiming for 25-30 seconds. That is the whole sequence.
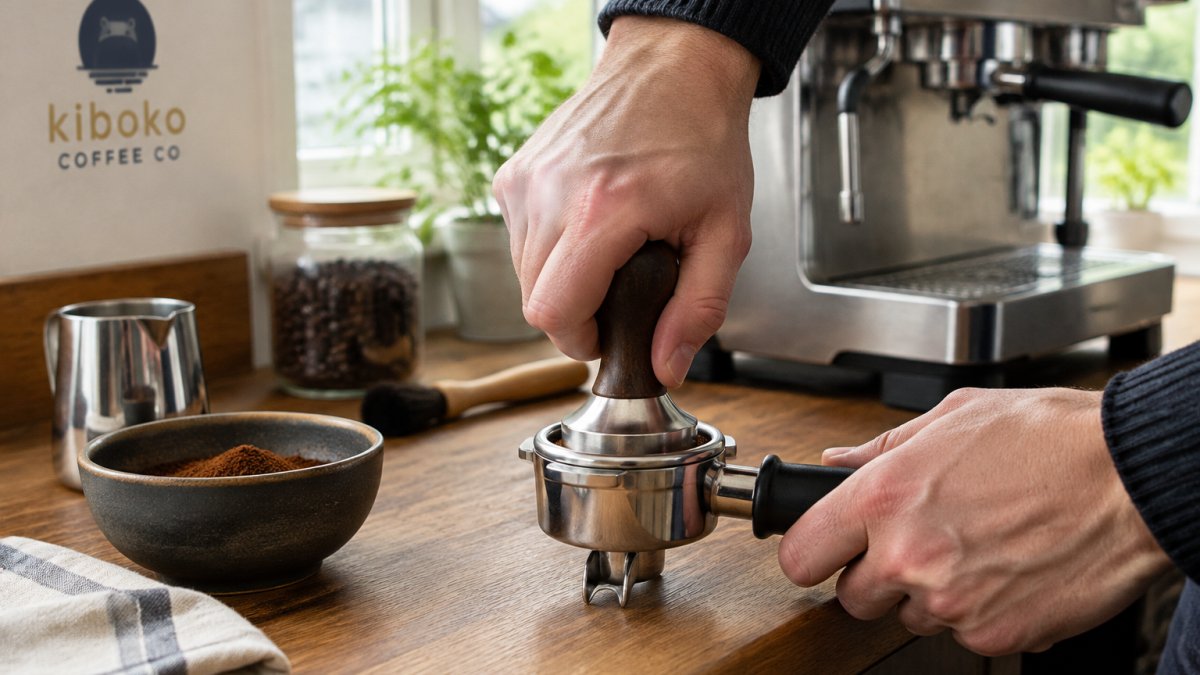
Work through it in order:
- Switch the machine on and let it heat fully.
- Flush the group head for a second to settle the temperature.
- Weigh 18g of ground coffee into the basket.
- Level the bed with your finger, then tamp flat with firm, even pressure.
- Lock the portafilter in and start the shot immediately.
- Watch the flow and note the time.
Watch out: pulling a shot on a cold machine gives you a sour, thin cup every time. Preheat is not optional.
Espresso Grind Size: Getting It Right
Espresso grind size should feel like fine sand, clumping slightly when you pinch it. If it feels powdery and dusty, you have gone too fine. If it feels gritty, go finer.
Grind is the single biggest lever you have. Change it in small steps, one notch at a time, and pull a shot after each change.
Grind consistency matters as much as grind size. An uneven grind means some particles over-extract while others under-extract, and no amount of dialling in will fix that.
How Long to Pull an Espresso Shot
An espresso shot should take 25 to 30 seconds from the moment you start the pump. Within that window, you are looking for a steady, honey-like flow and a crema that holds together.
Use this as your reference:
| Shot time | What it usually means | What to change |
|---|---|---|
| Under 20 seconds | Under-extracted, sour, thin | Grind finer |
| 25-30 seconds | Balanced, sweet, syrupy | Leave it alone |
| Over 35 seconds | Over-extracted, bitter, dry | Grind coarser |
Time is a guide, not a rule. Taste decides. If the shot tastes good at 32 seconds, it is a good shot.
Dialling In: A Repeatable Workflow
Dialling in means adjusting grind and dose until the shot tastes right, and doing it the same way every time so you can repeat the result. Most beginners change three things at once and then cannot tell what worked. Change one variable per shot.
Our repeatable workflow:
- Lock the dose. Keep it at 18g in, 36g out. That is a 2:1 brew ratio.
- Set a baseline. Pull one shot and note the time and taste.
- Adjust grind only. Sour? Finer. Bitter? Coarser. One notch.
- Repeat until balanced. Usually two to four shots.
- Record it. Note the grind setting and dose so tomorrow is easy.
For a fuller step-by-step method, see our guide on how to dial in espresso shots at home.
Making Espresso Without a Machine
You can make espresso-style coffee without a machine, but not true espresso. A moka pot, AeroPress or French press builds pressure differently, so the texture and crema will not match.
What each one gives you:
- Moka pot: strong, syrupy coffee, closest in body to espresso
- AeroPress: clean and flexible, good for a concentrated cup
- French press: full-bodied but not concentrated enough for espresso
Treat these as excellent coffee, not espresso. Set expectations honestly and you will enjoy them more.
Troubleshooting: Why Your Espresso Tastes Sour or Bitter
Sour espresso means under-extraction; bitter espresso means over-extraction. That single distinction solves most beginner problems. Everything else is a matter of degree. But taste alone is not enough, you need to map what you taste and see to a specific cause and a specific adjustment. This section gives you a systematic diagnostic workflow rather than a list of guesses.
The Diagnostic Workflow
Work through these steps in order. Change one variable per shot and taste after each change.
- Taste first. Sour, bitter, weak, strong, or a mix?
- Check the flow. Fast, slow, uneven, or sputtering?
- Check the puck. Is it soggy, cracked, or unevenly coloured?
- Adjust one variable. Grind is usually the first lever; dose and yield come next.
- Repeat and record. Note the grind setting, dose, yield and time so you can return to a good shot.
Symptom-to-Cause Map
| What you taste or see | Likely cause | First adjustment |
|---|---|---|
| Sour, thin, fast shot (under 20s) | Under-extraction | Grind finer, one step |
| Bitter, dry, slow shot (over 35s) | Over-extraction | Grind coarser, one step |
| Sour and bitter at once | Uneven grind or channelling | Improve distribution; check grinder |
| Weak and watery | Too much water for the dose | Reduce yield or increase dose |
| Strong and harsh | Too little water for the dose | Increase yield slightly |
| No crema | Stale beans or very old roast | Use beans with a recent roast date |
| Sputtering flow, patchy puck | Channeling | Distribute grounds evenly before tamping |
| Shot runs fast no matter how fine you grind | Stale beans or grinder limitation | Check roast date; consider grinder upgrade |
Sour Shots
Sourness is under-extraction: water has not pulled enough sweetness and body from the grounds. Common causes are a grind that is too coarse, a dose that is too low, water that is too cool, or a shot that finishes too quickly. Grind finer first. If that does not fix it, raise the dose slightly or check that your machine is fully preheated. A very light roast can also taste sour at first; give it a few days more rest after roasting.
Bitter Shots
Bitterness is over-extraction: water has pulled too much from the grounds, including harsh compounds. Common causes are a grind that is too fine, too high a dose, water that is too hot, or a shot that runs too long. Grind coarser first. If that does not fix it, shorten the yield or clean the machine, old coffee oils in the group head and basket turn bitter.
Weak or Watery Shots
If the shot tastes thin rather than sour or bitter, the ratio is likely too long: too much water for the amount of coffee. Aim for a 2:1 ratio as a baseline (18g in, 36g out) and adjust from there. A weak shot can also come from stale beans, which lose the compounds that give body and crema.
Channelling
Channelling is the other common culprit: water finds a crack or weak point in the puck and races through, leaving you with a sour, patchy shot and an uneven puck. Better distribution before tamping fixes it.
Watch out: if you change grind, dose and yield at the same time, you will not know which change fixed or broke the shot. Change one variable per shot, always.
For a targeted set of fixes, read our piece on why your home coffee tastes bitter, and for the full dial-in method see our guide on how to dial in espresso shots at home.
Choosing Beans and Ordering Your First Bag
Freshly roasted coffee beans make more difference than any machine upgrade. Look for a roast date, not a best-before date, and buy beans rested for roughly a week after roasting.
Our Nyumba Blend at £10.99 is where we point most beginners.
If you want bean recommendations before you buy, our guide to the best coffee beans for home espresso and our roundup of the best espresso beans for beginners both cover the options in detail.
Making espresso at home rewards patience more than equipment. Start with fresh beans, one variable at a time, and a scale, and the results come quickly.
Frequently Asked Questions
What equipment do beginners need to make espresso at home?
You need an espresso machine, a burr grinder, a digital scale, a tamper and fresh coffee beans. A distribution tool helps but is optional. Freshly roasted beans matter as much as the machine, so buy from a roaster that ships soon after roasting.
What coffee grind is best for espresso?
Espresso needs a fine grind, similar to table salt, so water pushes through the puck in around 25-30 seconds. Too coarse and the shot runs fast and tastes sour; too fine and it chokes the machine and tastes bitter. A burr grinder gives you the consistent grind size espresso demands. Adjust in small steps and pull a shot after each change.
How long should an espresso shot take?
A standard double shot should take roughly 25 to 30 seconds from the moment you start the pump, producing about 36g of liquid from an 18g dose. That is a 2:1 brew ratio. If your shot finishes in 15 seconds, grind finer. If it takes 40 seconds, grind coarser. Taste is the final judge, not the clock.
Can you make espresso at home without an espresso machine?
Yes. A moka pot, AeroPress or French press can produce a strong, espresso-style coffee without a machine. The texture and crema will differ from a true espresso, but the flavour can still be excellent. Use a fine grind for the moka pot and AeroPress, and choose freshly roasted beans for the best results.